
Building a tabletop press is a fantastic way to work together with your teen on a challenging, hands-on project. With a little bit of planning and a day of fairly simple constructions, you and your teen will build a long-lasting tabletop press, create your own print designs with linoleum blocks, and letterpress a series of unique prints. Use your creations to make personalized cards, stationary and letters!
Note: As this project has many steps, it might be easier to read all the directions first and visualize or draw a picture of the finished product before starting.
What You Need:
❑ Four 12″ x 12″ sheets of ¾” plywood
❑ Six 4″ x 12″ sheets of ¾” plywood
❑ Five 8″ x 12″ sheets of ¾” plywood
❑ Four 16″ lengths of 1/2″ dia all-thread
❑ 16 sets of nuts and washers to fit the all-thread
❑ One 9″ press screw, dia 11/16″
❑ Wood glue
❑ Drill with 1/2″ and 11/16″ bits
(All materials available at most hardware stores)
What You Do:
1. Glue all 12″ x 12″ pieces of plywood together using wood glue to form a 12″ x 12″ x 3″ block.
2. Once the block is made, use the ½” bit to drill four holes total, two on each side of the block. The holes should be centred and no more than 2″ apart.
3. Place the all-thread through them. Be sure to put cardboard or newspaper under the base to avoid scratching your work surface.
4. Use eight sets of washers and nuts (two sets per hole, one above and one below the base) to hold the all-thread in place.
5. Glue all 4″ x 12″ pieces of plywood together to create a 4″ x 12″ x 4.5″ block.
6. Turn the block vertically on its side so that you may drill through the 4.5″ side. Using a ½” bit, drill four holes (two on each side of the upper bar) to match the holes in the base.
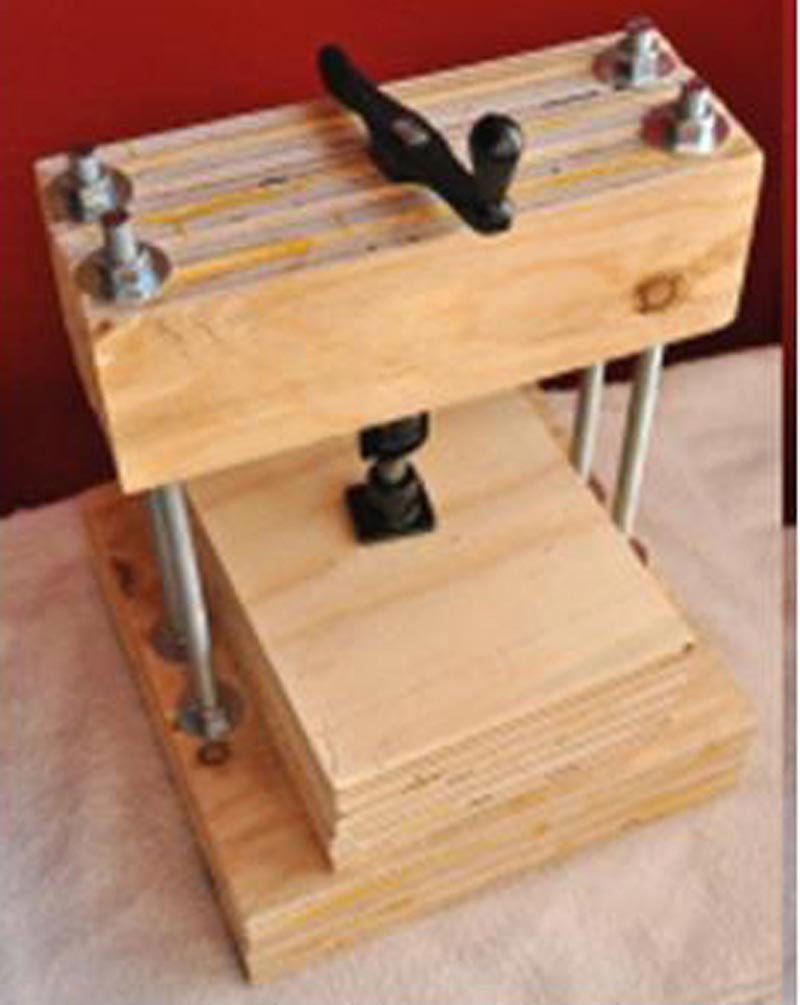
7. With the 11/16″ bit, drill one hole through the middle of the block. Insert the press screw so that its handle may stick out from the top of the upper bar.
8. Once the press screw is attached, slide the upper bar over the all-thread, using eight sets of washers and nuts to keep it in place.
10. The platen is the block that presses down onto the base to create an impression in your paper. Glue all 8″ x 12″ pieces of plywood together with wood glue. Once it’s dried, your platen is ready to use.
What You Need To Create Letter-Pressed Prints:
❑ One Speedball linoleum cutter set
❑ Several blocks of mounted linoleum, no larger than 4″ x 6″
❑ Printmaking paper cut to 8″ x 12″
❑ Block print ink in the colour of your choice
❑ One ink brayer
(All materials available at most art stores)
What to Do:
1. Following the instructions on the linoleum cutting kit, create your own designs by cutting into the linoleum blocks.
2. Try tracing designs in pencil first; then use the cutter to dig out the lines. Keep the designs simple at first; then get more creative as you become familiar with the process.
3. Place a linoleum block face-up on the press base.
4. Using a brayer, lightly ink the linoleum, making sure to spread an even coat of ink over the entire design.
5. Carefully place a sheet of paper over the linoleum.
6. Finally, place the platen on the top of the paper.
7. Turn the press screw handle so that the screw may lower onto the platen. Screw it tight, until it can’t be turned anymore. Immediately unscrew it and carefully remove the platen and paper.
Congratulations! Your letterpress print is now complete!