
Today, nearly everyone has a digital camera, and it’s easy to take a perfect photograph every time. But like many electronics, cameras may seem mystical and complicated to your child, and they can be expensive too. This project teaches how simple a camera can be, and how light forms an image on the film. It’s an inexpensive project, a great science experience to learn about optics, and a fun art activity, too! Best of all, making the camera is only the beginning.
The pinhole camera was the first camera ever invented, and it’s made up of only a small aperture, a shutter, a light-proof container, and some film. The images produced are surreal, artsy, and quite unique. To start the activity, you may want to show your child the differences in quality and style between old photographs and today’s images. Your child will be amazed that he can build his own camera and take his own artistic photographs.
What You Need:
❑ 35mm film
❑ A small box: wood, metal, plastic, or cardboard. It should have room to hold film canisters on both sides and still allow space in the middle for taking the photograph (a 7-inch cube or larger works best)
❑ 1/4″ wooden dowels
❑ Black marker
❑ Black spray paint
❑ Heavy cardboard
❑ Aluminium foil
❑ Sewing needle or sewing pin
❑ Craft glue
❑ Used sewing thread spool or wooden spools
❑ Electric drill
❑ Hacksaw or dremel cutting tool
Note: Because of the different steps and tools involved, this is definitely a project that your child should do along with an adult.
What You Do:
1. Start by setting up your film canister. Your film canister will sit on one side of the box, and the film will wind across the aperture into the other side. Measure where the head of your film canister sits, and drill another 1/4″ hole there. This should allow space to fit the dowel into the hole, and into the top of the canister, so you can wind film as you take photos.
2. You will need to build the spaces to hold your film canister, and used film, in place while you use the camera. Cut the pieces of cardboard to separate these sections of the interior. Check to make sure they fit snugly and allow room for the film, and glue them in place.
3. Measure the size you’ll need for your dowel. It will need to fit into your spool, which will wind your film; then slot through the top hole into the camera and plug into your film canister. Once you know the right length, saw the dowel to the right size using a hacksaw or dremel. While you have the saw, you’ll also want to slot the end of the dowel, so it fits snugly into the film canister for rotation.
4. Once you have your box and dowel ready, take them to a ventilated area and spray paint them black on the inside. This will help reduce the light and keep the film protected.
5. While your paint dries, work on making the aperture for your camera. Use tin foil, or a piece cut from an aluminium soda can. Take a sewing needle or pin, and carefully rotate it in order to drill a hole into the aluminium. Do this slowly, rather than punching right through the metal, because you’ll want it to be smooth.
6. Once you have a small hole, even it out by using sandpaper to sand off sharp . You may want to once more work the pin through and sand it once more to make sure the aperture is even and well formed. Remember, this is how light comes into the camera and will help determine your image quality.
7. Now it’s time to make a shutter, the piece that attaches in front of your aperture. So you can control when to take a picture. Cut out a small piece of cardboard that will fit the front of your camera on top of the hole you made. Colour it black on the inside and cover it with black tape. Attach this in front of the hole so that no light may sneak in.
8. Once your paint is dry, attach the shutter to the front of the camera’s drilled hole using black tape.
9. Next, attach the little pinhole aperture you made from the aluminium to the camera to the inside of the box. Use a small piece of masking tape or electrical tape, with a chunk cut out of the centre, and centre it over the larger hole you drilled for the aperture in the centre.
10. Colour the masking tape with a black marker to make it less reflective and more light-proof from the inside.
11. Next, mount your pieces together. Attach the dowel and spool, and work them through the box, into your film canister. You may want to cut and use a small black felt washer on your dowel, between the wood spool and the camera, to prevent extra light from leaking in.
12. In order to wind the film without opening the camera, you will need to know how many turns to make on your spool. Make a mark on the spool, and on the top of the camera next to the spool, so you can measure how far you’re turning it.
13. Pull some of the film from your canister and wind it to the other side of your box. Using a black Sharpie, mark the space where your film will get exposed (from each piece of cardboard to the next). Then, wind the film back into the canister, paying attention to how many rotations are needed to move the film to the next exposure.
14. Check once or twice more to see an average of how far to wind the spool when you take a photo.
15. You will need to go into a dark place for the next step. Notice that you can’t pull film out of the spool by winding, only rewind film into the spool. So, you will need to unwind the film into the other side of the camera; then wind the film back into the canister, while you take pictures. However, if you wind film anywhere where there is light, the film will get exposed and you won’t be able to shoot with it. So, go into a dark room and unwind the film by feeling where it should go, into the opposite side of your camera. Then, close up your box carefully.
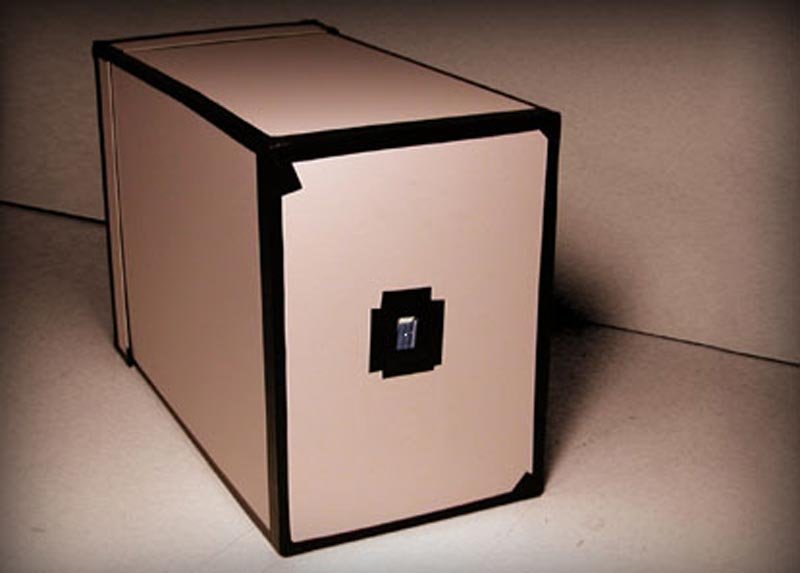
16. To make sure your box is light-proof, use black photo or electric tape to secure all the openings from your box while you take photographs.
Now, you’re ready! To take a picture, hold the camera very steady and point it towards what you want to photograph. Open the shutter carefully, so light can reach in your aperture. Use the following guidelines for exposure with ISO 100 or 200 film:
❑ Outdoors in the bright sun: 2-3 seconds.
❑ Outdoors when overcast or shaded: 5 seconds.
❑ Indoors with normal room lighting: 5-10 minutes
If you want to attach the camera to a tripod, you can simply use a few rubber bands to hold it on.
When you’ve used your roll of film, you can take it to a drug store to develop it, just as you would with a normal film camera. You may want to let them know that you were using a pinhole camera and that your picture sizes may be abnormal, so they can take care while developing them. Hang your photos on the refrigerator, or along the walls in your home to show off your new creations!